In my last post, I shared briefly about workflow and tools during our continued COVID-teaching time. This. Is. Hard. Teachers across our nation and globe are finding themselves teaching under varieties of circumstances with challenges that test our every limit. When it comes to using technology to help students learn mathematics, tool CHOICE has always mattered… and the WAY those tools are USED has also always mattered. But we find ourselves in unconventional, long-haul circumstances where teacher-SURVIVAL (literally during a pandemic, and with respect to our practice) can matter as much or more than making best-case-scenario pedagogical choices. We’re doing our best, where we are, with what we have, with the deck we’ve each been dealt, given the same 24-hours each day. (I happen to be “in-person” teaching students in-the-Zoom and in-the-room simultaneously, masked behind plexiglass barriers. It’s still surreal, even though I’ve been in this modality for 4 months now.)
I just finished listening to a recent episode of Justin Reich’s TeachLab Podcast featuring Dan Meyer in the Failure to Disrupt Book Club series. A question posed by regular guest Audrey Watters had me leaning in to my laptop with raised eyebrows (at the 36:19 mark):
“… Dan can you talk a little bit about… the kinds of things… features… that you would say no to? …What is something… teachers want that you’re like, nah, we ain’t gonna do that…?”
SPOILER: The “very big” feature request from teachers in recent months involves the desire for more auto-grading.
Dan goes on to say,“…By design, we (Desmos) have not exposed to students whether they are RIGHT or WRONG… That’s been intentional.”
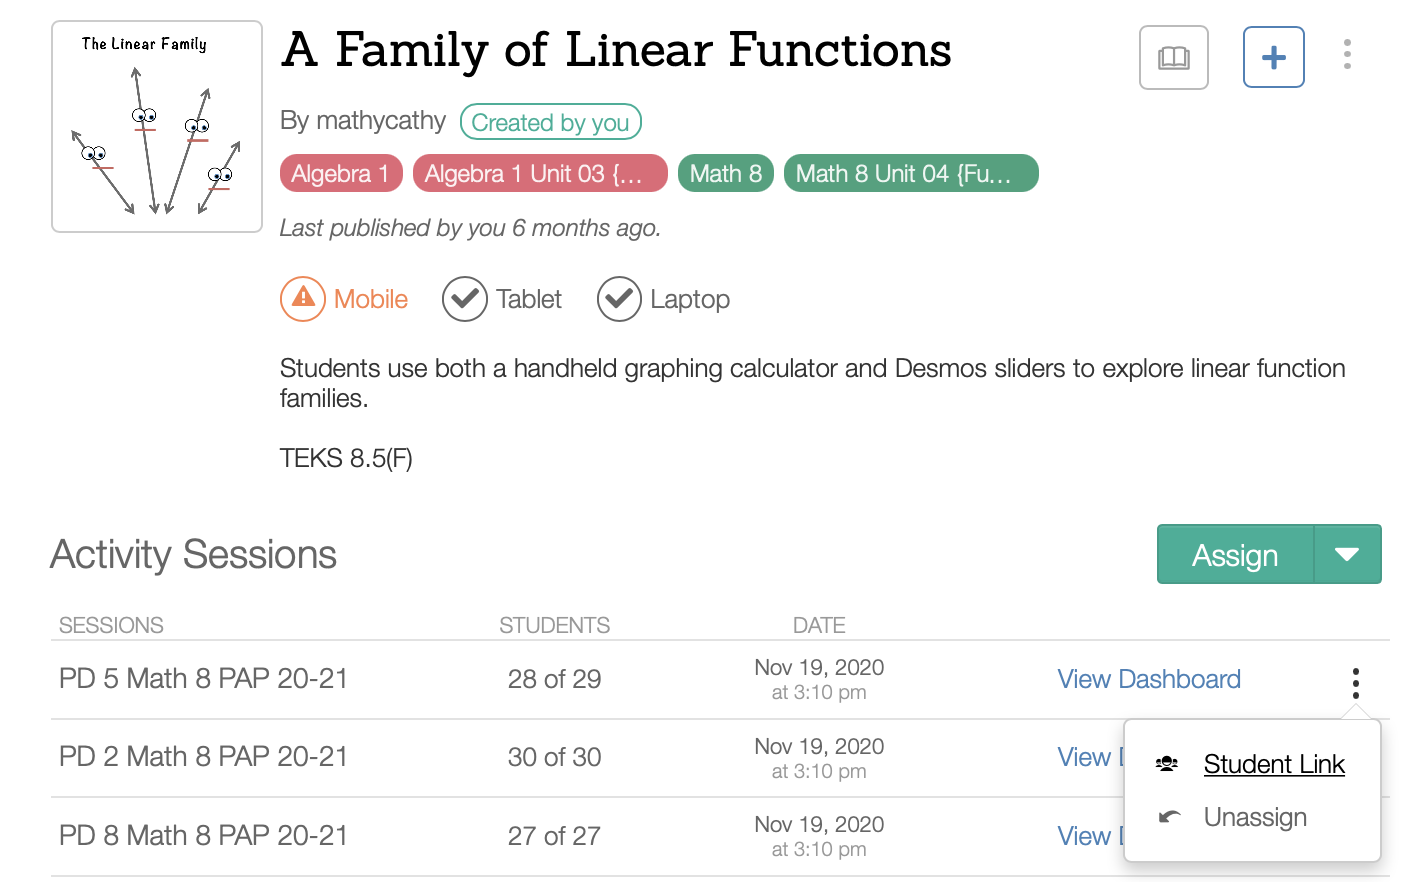
Listen in (38:00 minutes) as Dan elaborates on the WHY. His responses resonated with me. For me, hands-down, Desmos has been the absolute best tool to help further mathematics education with our students’ “creativity and connection to other students” in general, but ESPECIALLY during this pandemic. Desmos Activity Builder provides a platform for students to experience mathematics in dynamic and even playful ways that simply cannot happen without technology. Desmos can help encourage student discourse that aids in building a community of learners who see math, not as static, but as something we can explore, test, attempt to break, and more deeply understand together.
That being said, I have never “graded” a Desmos activity.*
Perhaps being dealt the deck of teaching synchronously in-the-Zoom and in-the-room shapes my lens here. I have students who show up, log in to Desmos, and participate every day. Since we share the same time and space, whether in-person or virtually, I use Desmos activities to drive our live lessons. For us, Desmos is an experience, not a summative assessment. If students were to join a Desmos activity, and ask that age-old question, “Is this GRADED?” it would break my heart a little. They never ask me this because it’s not something we’ve ever done. Yes, we teachers are expected to put grades in our grading software programs. This is a deeply-ingrained part of “school”. For me, Desmos is just not the best tool for that. A fork is not a spoon.
I have the UTMOST RESPECT for the droves of teachers who are teaching themselves and others Desmos CL (computation layer coding language) in order to make Desmos Activity Builder “grade” student thinking. And I am a firm believer that many of the tech tools we have at our access can be used in unconventional yet effective ways, so using Desmos for grades isn’t right or wrong, it’s a use-case choice. I have seen some AMAZING Desmos assessments out there that use the platform to ask students deep questions, while taking advantage of providing students with access to so many of Desmos’ strongest features! KUDOS TO YOU! For those looking to assess understanding quickly, not necessarily using the strengths of Desmos along the way, I’m thinking about you right now… those trying to use Desmos activities for “learning checks” that are graded for you. When a tool has to be undone like a knotted pretzel and forced to do a thing that should be easy to do, maybe it’s not the best tool for that thing we are trying to make it do. A fork is not a spoon.
I’m not here to judge anyone’s tool choices or uses, *ESPECIALLY DURING A GLOBAL PANDEMIC* but I would like to propose another option for graded assignments. I’m looking for solutions to our many teaching challenges too, and here’s one that has helped me to assess AFTER our rich, shared Desmos experiences. It’s not pedagogically perfect, is certainly NOT new, but I think it might be an option to consider for folks who simply need a tool that provides students with opportunities to practice, demonstrate understandings, and quite frankly, “grade” stuff efficiently.
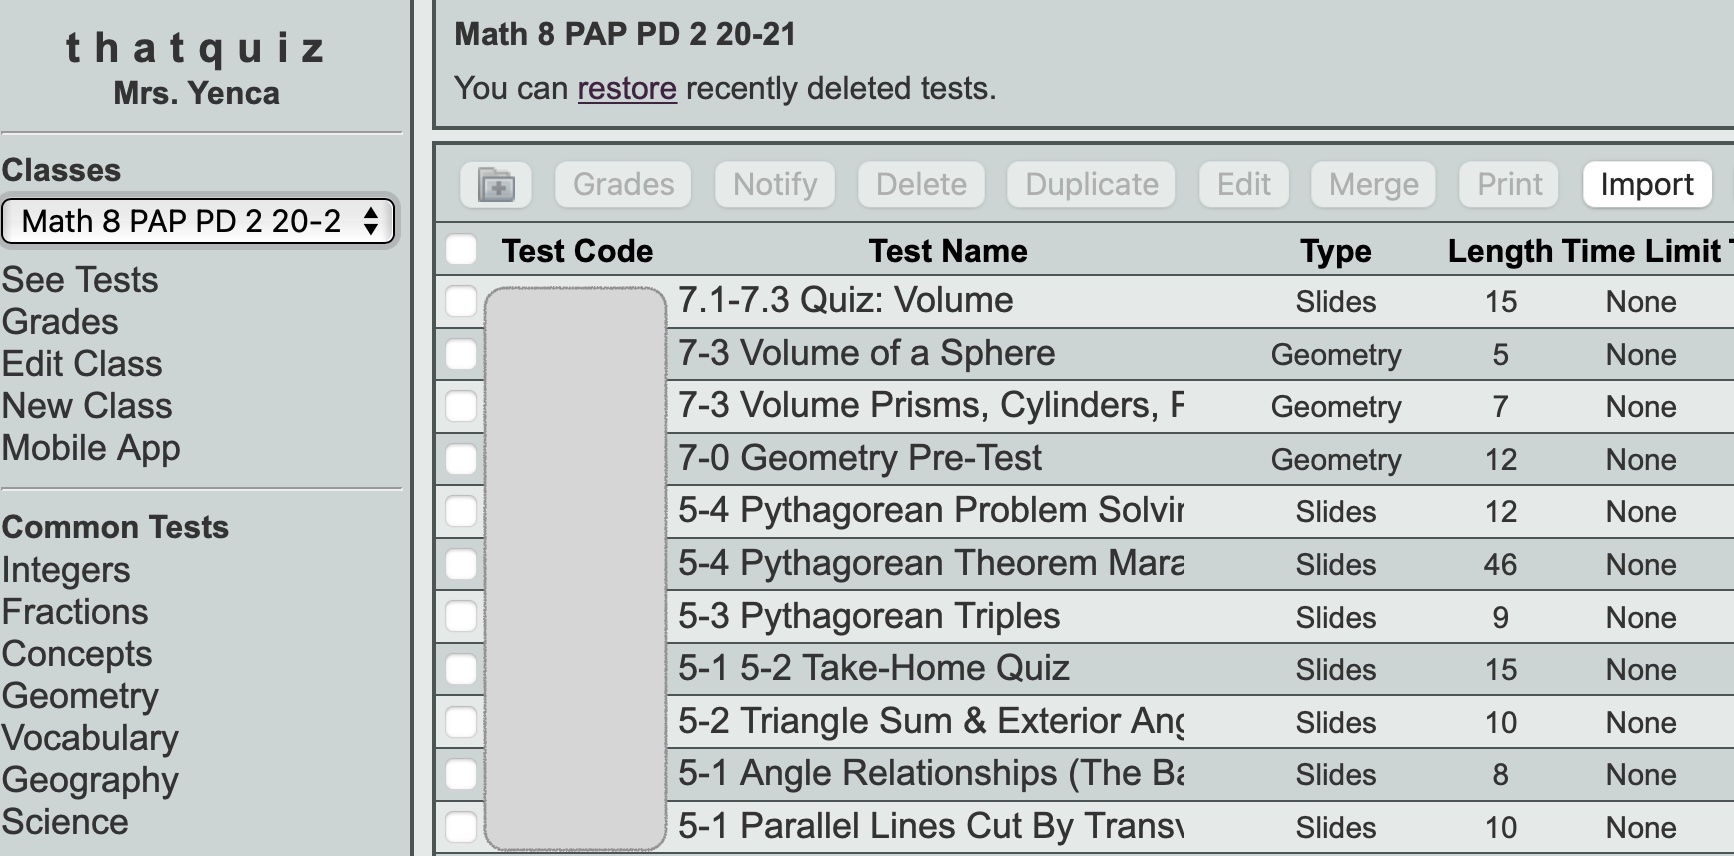
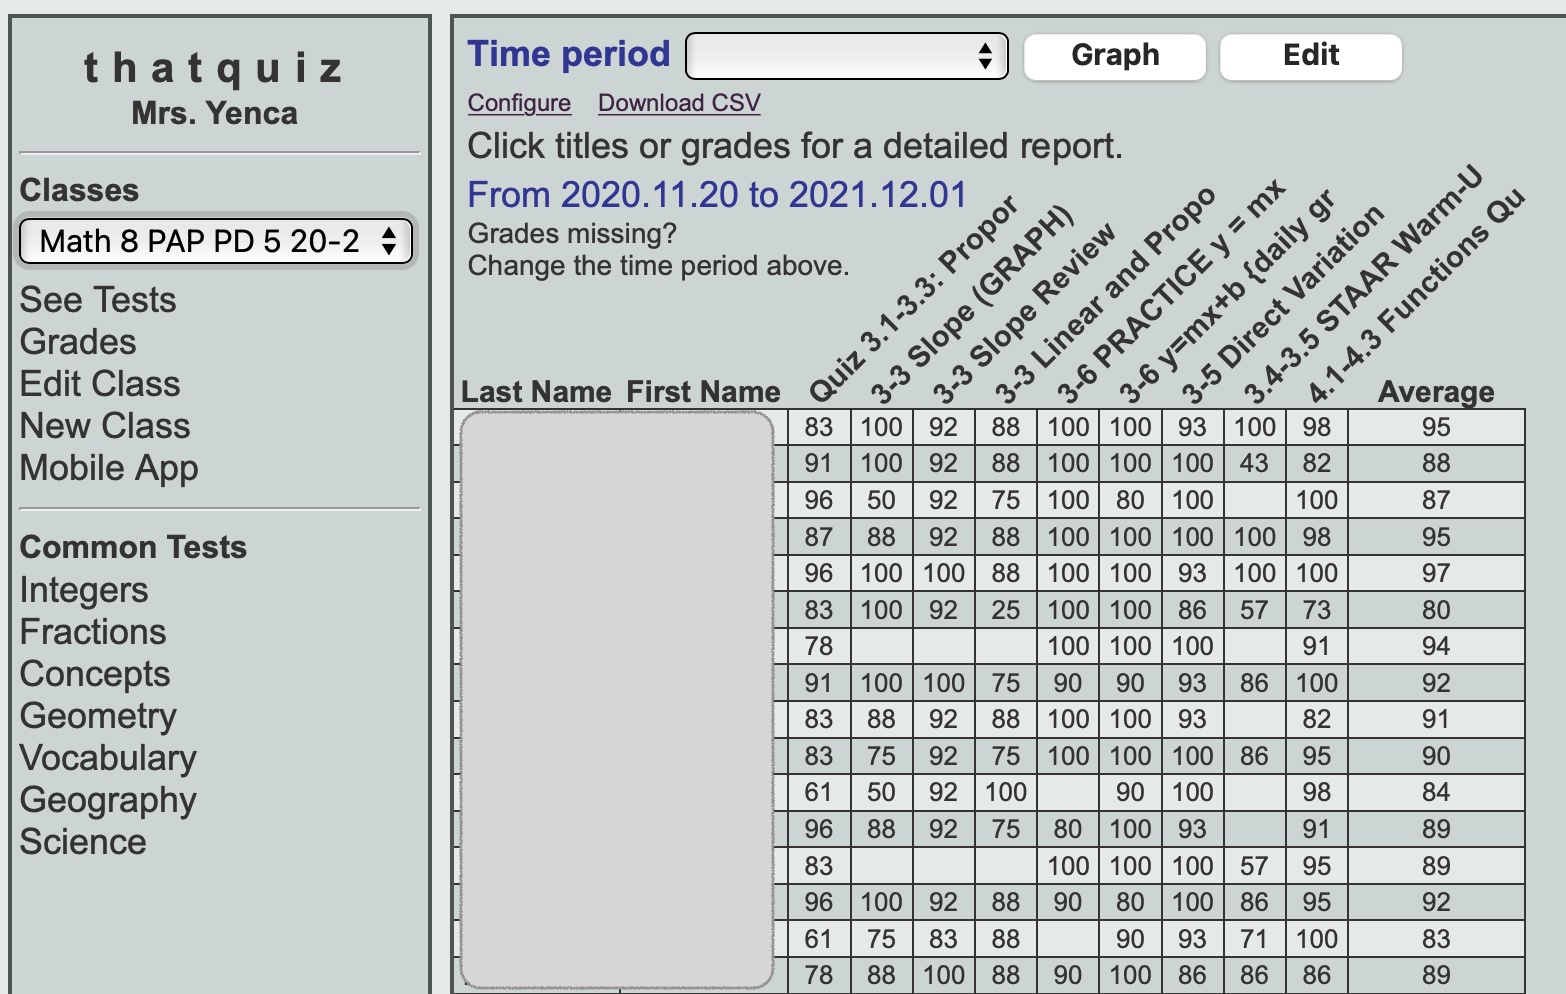
Check out my tag cloud to the right, and you’ll see “ThatQuiz” listed. This pandemic has propelled me to learn and understand ThatQuiz’s capabilities more than ever before. ThatQuiz does some automated things (generates skill quizzes based on constraints, for example), but it’s also a creation platform. You can make of it what you’d like. It auto-grades. I like using it to check understanding. With password-protected student logins, class data is collected over time in a user-friendly way. The teacher can even set a threshold (for example, students must earn 80% or will be prompted to redo) which propels students to seek help too. ThatQuiz has always been free, and promises to remain free forever, and to exist forever, so it’s worth a look if you’re new to it. Is ThatQuiz the utensil you might be looking for? Check out this brief video, go explore, and keep being your awesome teacher self. Then, check out this brief but thorough tutorial from ThatQuiz.

*The only Desmos Activities I have “graded” were longer-term projects that use the Activity Builder as a platform. 🙂