Sara VanDerWerf claims that “Stand & Talks” are “the best thing she ever did to get students talking to one another” and I believe her. For this 2018-19 school year, I’ve implemented “Stand & Talks” intentionally (though, moving forward, I hope to use them even MORE often) and there are SO MANY benefits.
For my middle schoolers, giving them the opportunity to TALK and MOVE early in the lesson provides social, kinesthetic, and math benefits for the rest of the class period. It gives them opportunities to make math observations judgment-free, and to talk to students with whom they might not otherwise interact. We’re moving, talking math, and building community… and it only takes a few minutes! Mere minutes that many of us teachers might use to TELL students things we want them to notice… rather than giving THEM the chance to do so first. This is not “one more thing” to do in our classrooms for which we “don’t have time”… it’s likely a time swap… trading in a LESS EFFECTIVE strategy for a MORE EFFECTIVE one… at least, this is how I see it with my own students! 🙂
Sara provides this AMAZING blog post, detailing her methods and teacher-script for implementing a “Stand & Talk” in her own classroom. Before reading on here, I suggest you check out her post first.
In recent months, I’ve used Apple Classroom to share “Stand & Talk” visuals with my students on their iPads. First, I ask students to ensure that their bluetooth and wifi are ready to go. In the Apple Classroom app on my teacher iPad, I open my current class of students to confirm that most of them have their iPads on and ready to receive a visual from me. I can see icons of students’ faces on my own iPad screen and toggle to see tiny live previews of their individual iPad screens… otherwise their faces show with the label “offline”.
Ahead of time, I’ve prepared a visual to share with students. Sometimes I create the visual myself using Apple’s Keynote. Other times, I use a visual I’ve found online from a fellow #MTBoS-er. I have this visual saved as an image on my teacher iPad camera roll.
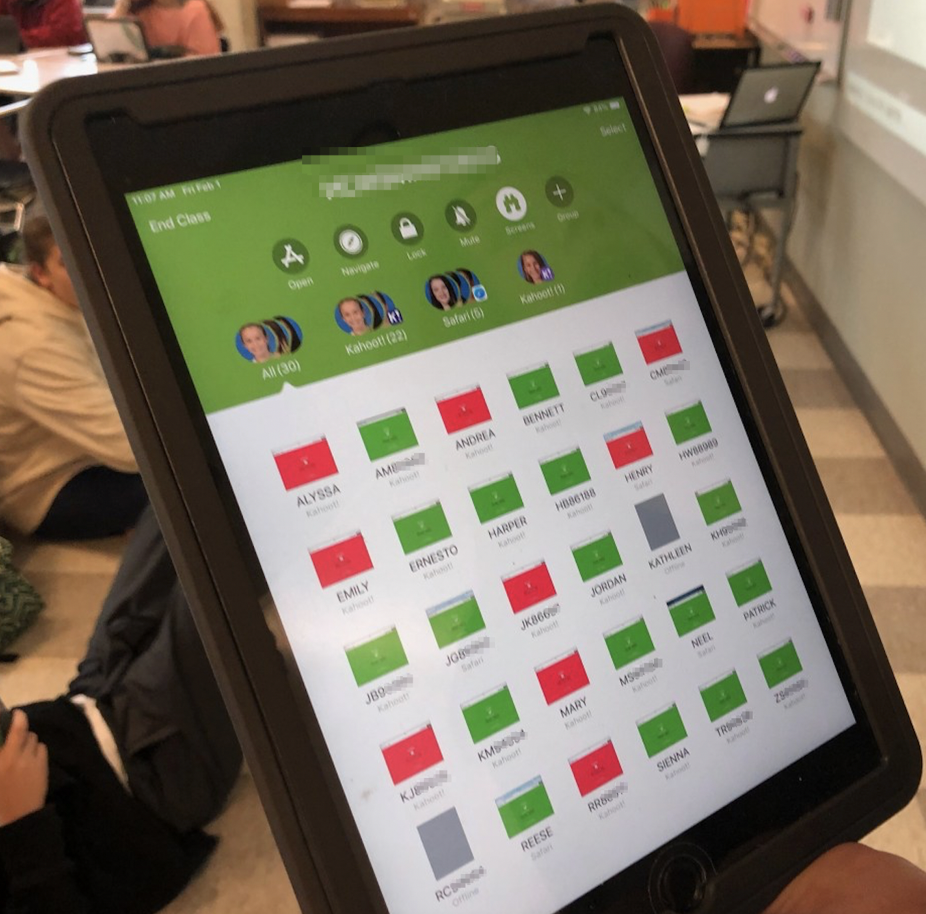
I announce that I have something to share with every student! I select the image from my camera roll. Since I’ve already selected the class of students in Apple Classroom beforehand, the “share square” option for the selected image at hand gives me the option to AirDrop the image to the entire class of students in front of me with one touch of the screen! In a quick moment, I’ve AirDropped the image to my students… like magic! By the way, this process never loses its novelty on middle schoolers! And… even if not EVERY student is ready with a functioning iPad when I AirDrop the image, a “Stand & Talk” still works great. A student who did NOT receive the image from me naturally pairs up with a student who DID receive the image… and that student shares the image with her/his partner so they have it too.
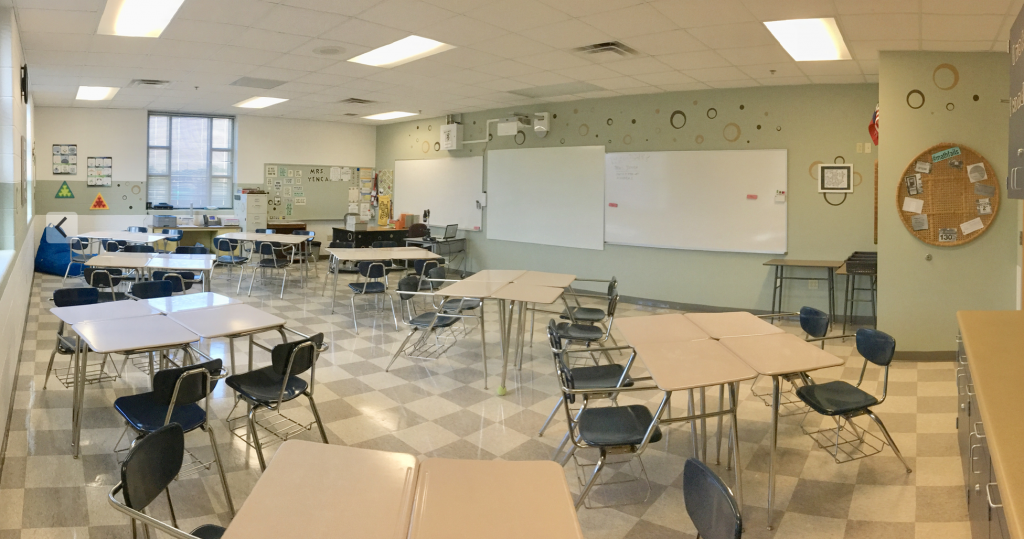
Proceed with Sara’s process here… with iPads in hand, students stand up, walk across the room, partner up, and notice and discuss *insert a big number here* things about the image that’s just been shared. {Bonus – when the “Stand & Talk” is over, students still have access to the image because it’s saved on their OWN camera rolls, thanks to AirDrop within Apple Classroom.} I walk around, listen in, and work VERY HARD to NOT TALK… JUST LISTEN. Once students have noticed and discussed *big number of* things about the image, they start returning to their own seats, which, in my classroom, equates to 8 groups of 3-or-4 students each. Mind you… students have NOT been talking with the people they normally sit with… they moved around and talked with people NOT in their groups.
So… next phase! Now that students are seated back with their groups, I ask them to share their favorite noticings from the “Stand & Talk” with one another. With iPads in hand, students continue to talk and point and share… and I continue to NOT talk and to LISTEN and walk around, likely making all sorts of faces as I try NOT to chime in, ha! 🙂 I ask each group to choose a spokesperson or two to get ready to share out ONE THING they noticed about the visual. Students decide within their own groups about the ONE THING they want to share, and who’s going to share it. We come together as a class, I stand in the middle of all the groups as they WILDLY volunteer to share out first (so no one steals what they want to say before they get to say it… smooth move… I know…) and I point to each group, signaling each spokesperson to share. Sometimes we take ONE lap around the room… ONE sharing from each of EIGHT groups of students… and sometimes I surprise them and take TWO laps… or THREE… Some visuals spark more discussion than others… and sometimes, what ONE group shares helps another group notice something new that THEY want to share.
It really is a beautiful process!!!
By the time we, quote, “actually start the lesson”… we’re likely a good way into it, thanks to everything the STUDENTS have noticed and shared ahead of time.
Here are two examples of “Stand & Talk” images I shared this past week with my Math 8 students. This one was shared at the start of class on review day for a unit on 2D transformations in the coordinate plane. I created the slide in Apple’s Keynote and exported it as an image to my iPad camera roll:
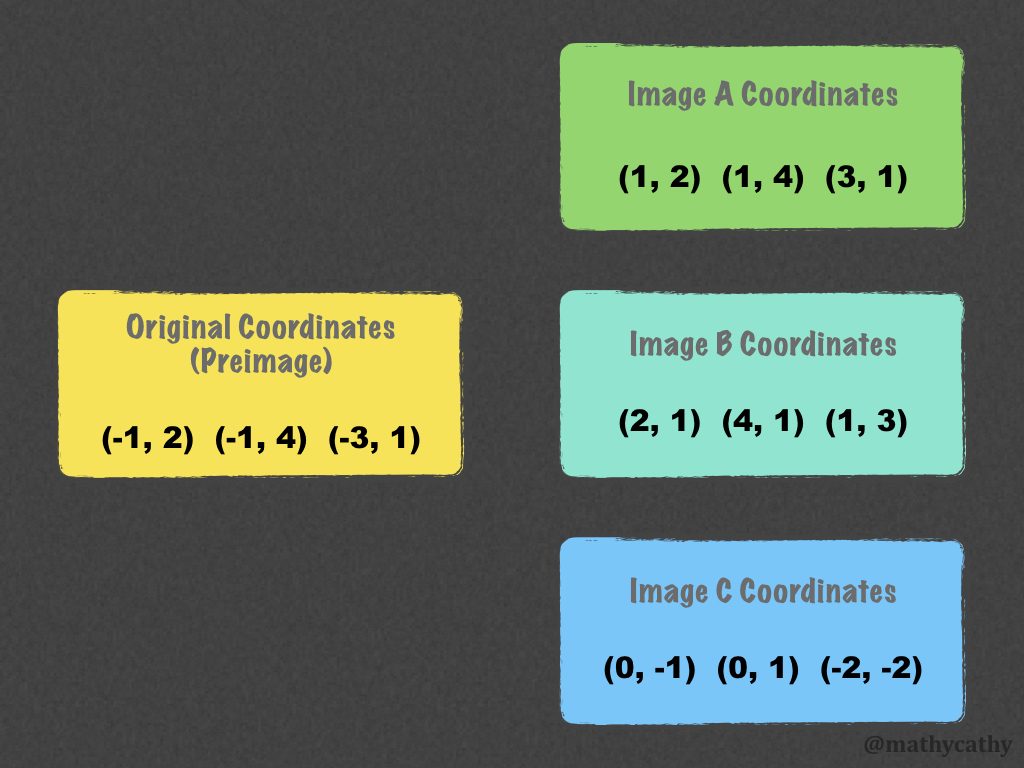
Surprise noticing: One student said that Image B was a reflection of Image A over the line y = x because he remembered the extension presented in this Desmos Activity earlier in the unit. MIC DROP!!!! What do you think YOUR students might notice about the coordinates shared here?
Here’s another image I found at MathHooks.com that I used at the very beginning of a scatterplots & data analysis unit, prior to any instruction whatsoever.
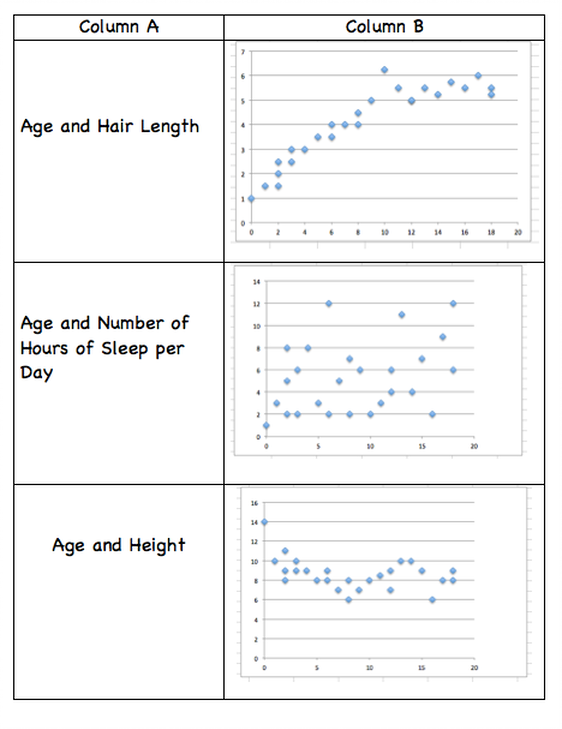
The vocabulary I heard was impressive! I heard words like “outlier” and “scatterplot” being used before I said ANYTHING. Students realized that Columns A and B did not match as presented, and swiftly opened this AirDropped image in their own drawing apps of choice, drawing lines to match correct descriptions from Column A to their corresponding scatterplots in Column B as they chatted together. During the share-out phase, students not only CORRECTLY matched the graphs, but ALSO entertained the idea of what the graphs might mean if the descriptions beside each graph DID represent the graph. So silly and fun!
Next, students completed this Desmos Activity... and I waited for THEM to ask more questions about vocabulary after their unsuccessful attempts to sort the cards within their groups on Screen 1. After a brief direct instruction, at students’ request, they were back to sorting cards! As green stacks appeared and student “experts” helped peers obtain green stacks too, we continued with the Desmos Activity to apply what we’d learned about correlation/association, and causation. Later, students had the opportunity to further apply their new-found vocabulary through this Desmos Polygraph Activity.
I have found that using a “Stand & Talk” before a Desmos Activity can be highly effective! “Primes the pump” before diving in! Here’s an example where creating a Keynote slide to “Stand & Talk” about helped students make connections between representations just before sorting cards in a Desmos Card Sort.
Used this #KeynoteForMath image to prompt a @StandandTalks today with Math 8 students just before this @Desmos #CardSort: https://t.co/JDzhaf0fTK I love the idea of giving Ss a static image to #StandAndTalk about just before sorting cards! #iteachmath #MTBoS #EveryoneCanCreate pic.twitter.com/JZyWOS2wDy— Cathy Yenca (@mathycathy) December 6, 2018
Looking ahead to your plans this week, where/when/how might you swap a component of a lesson where *you* had planned to do the telling… for a “Stand & Talk” instead?
What visual will you use?
How will you share this visual with your students?









Pingback: “Lead & Learn” with “Stand & Talks” Across Content Areas | MathyCathy's Blog – Mrs. Cathy Yenca
Pingback: A Classroom Visit from KLRU – Screens In School: Tech Transformation | MathyCathy's Blog – Mrs. Cathy Yenca