 If you’re not up to date on Texas math standards, we have new TEKS this year for grades K through 8. (How many standards are new or have moved from one grade level to another? Check this out!) Our district purchased new curriculum materials to help us adjust. While Texas is clear about *NOT* being “Common Core” we are definitely following the trend to teach higher-level math sooner and (in theory) in more depth than we used to. Next year, high school math courses will have new TEKS as well, so this year is an unusual year for me. I generally have one foot in “middle school math” and the other foot in “high school math” because I teach Algebra at the middle school level as well as 8th grade math. All this to say, I will be doing much more algebra in my 8th grade math courses than ever before. SWEET! Um… I think! 😉
A change for me this year is that I am not teaching 8th grade math to 8th graders, but primarily to 7th graders with a sprinkling of 6th graders in the mix. If you’re curious about what it means to teach and learn 8th grade math in Texas with the the new TEKS, click here. For our current Algebra TEKS (which will be changing for the 2015-16 school year) click here.
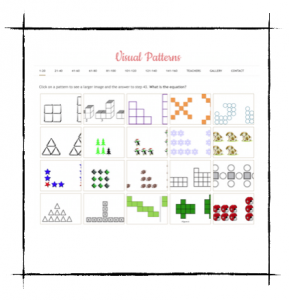
With such an emphasis on functions in both of the courses I teach, I think this is the year to introduce Fawn Nguyen’s Visual Patterns. I keep reading hither and yon about effective uses of these patterns, and I’m intentionally adding them to my practice this year. I have no idea why I haven’t thus far, except to make the typical reason/excuse that I’m concerned about “time” (which is generally a lame reason NOT to do something that will benefit kids and give them a deeper understanding of mathematics versus “covering the curriculum” in an allotted timeframe… but I digress…) So there, I’m doing it. Not sure when, but I’m doing it. My plan is to use Visual Patterns with “4-corners”.
I’m not sure if I do 4-corners “correctly” or if this has been #Yencafied but here’s how I play. I create 4 different problem sets that are similar in content and difficulty level, and identify each set with a number or clip art or something. Anything to distinguish each of the 4 sets. I mix them up (well, I make the photocopier mix them up – see the end of this post) and hand them randomly to students as they enter my classroom. Students try each problem set right away, individually, and silently at their desks. The first time I do 4-corners with a class, no student realizes that there are 4 different sets of problems, so it’s kind of fun to say, after they’ve been working for a few minutes, “You may have noticed that there’s a card suit (or whatever) at the top of your paper next to your name. Did you know that there are 4 different problem sets floating around?” Maybe it’s just *my* middle school students, but I liken this moment to me performing a magic trick. “Ah! Oh! I didn’t even see that!” and so on.
At what I deem to be the appropriate time, I send all spades to one corner of the room, clubs to another… you get the idea. Truthfully, not every corner of my room is conducive for student groups to meet, so I *should* call this “4 groups” instead. I usually end up sending a group or 2 to the hallway to meet, just so kids can be spaced apart from the other groups. They compare their papers, discussing and possibly correcting discrepancies. I ask each group to provide me with one paper they believe serves as an “answer key”. After I have a “key” from every group, we look at them using the document camera. Sometimes students explain and present the key, sometimes I do, but that’s the way I do 4-corners as a warm-up of sorts.
Here are Fawn’s resources remixed for 4-corners. I did the first 12 patterns this morning as a start, so I can have these ready to go. A photocopying tip for #Yencafied 4-corners: make a one-sided copy of the page with patterns 1 and 2, and do the same for the page with patterns 3 and 4. At this point you’ll have 2 copies of each page. If you put the original two pages face up and right-side-up in the photocopier tray (the patterns 1 and 2 page and the patterns 3 and 4 page), then the newly copied two pages face up and upside-down in the photocopier tray, the copier will do the daunting task of mixing up all 4 versions quite nicely so you don’t have to. Sure, some will be right-side-up and others will be upside-down, but that doesn’t matter at all if you’re just handing them to kids as they enter class. You’ll still have to pay the paper cutter a visit to chop the pages in half vertically, but they’ll be nicely mixed up already. I hope all of that made sense.
Thanks to Fawn! I hope you don’t mind my mini remix of your stuff. 😉
Word Doc:
PDF:


